RV solar power is all about harnessing the sun’s energy to keep your vehicle powered up while you’re off the grid. It’s green, it’s efficient, and it’s a game-changer for extended travels. Let’s break down what this really means.
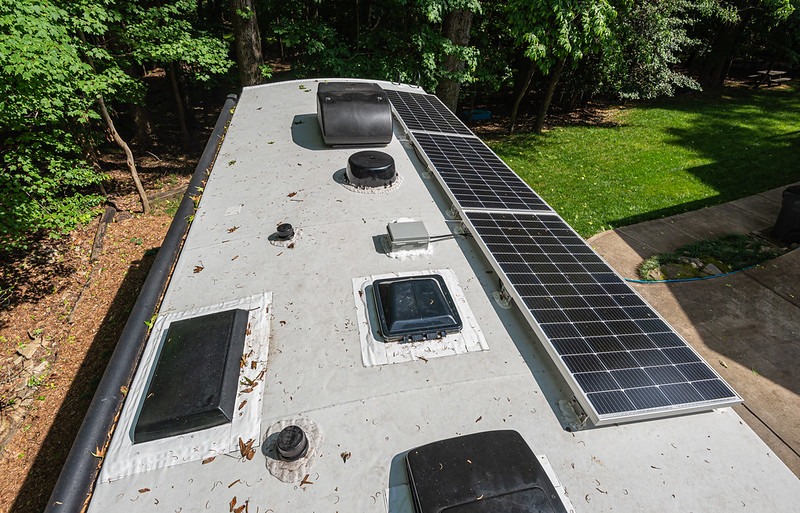
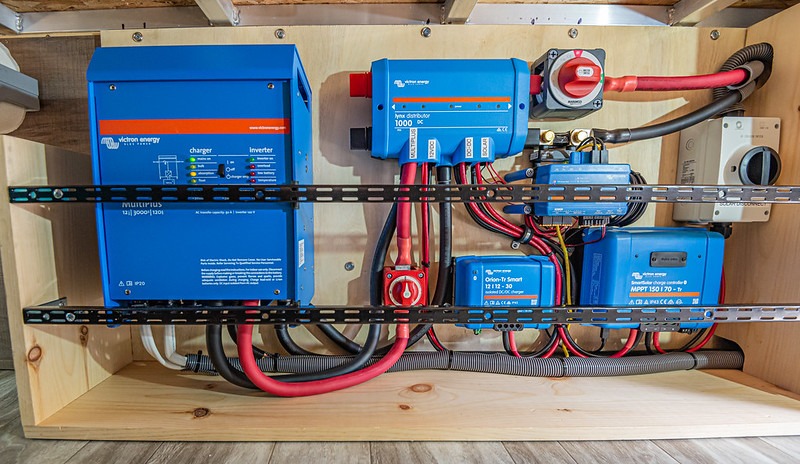
First off, you’ve got solar panels which capture sunlight and convert it to electricity. These are usually mounted on the roof of your RV. Then, there are batteries that store the electricity so you’ve got power even when the sun’s not shining. The charge controller is like the traffic cop, regulating the power going from the panels to the batteries to prevent overcharging. Finally, the inverter converts the stored DC power from the batteries into AC power that your appliances can actually use.
Why should you care about RV solar power? For starters, it can save you a ton on generator fuel. Plus, it’s super quiet – no more loud generator noises ruining your peace. It’s also pretty easy on Mother Earth since you’re using a renewable energy source. Think about the freedom of not having to rely on campground hookups. You get to choose those picturesque, off-the-beaten-path locations.
To sum it up, RV solar power is about freedom, savings, and sustainability. It’s a solid step toward making your travels more enjoyable and less dependent on external power sources.
Essential Equipment for RV Solar Power Systems
Getting into RV solar power means you’re going to need some key gear. Each piece has a role to play in keeping your setup humming.
Starting with solar panels – think of these as your personal sun-catchers. They come in different types, like monocrystalline and polycrystalline. Monocrystalline ones are usually more efficient but can be pricier. Polycrystalline panels are more budget-friendly and still get the job done.

Next up are the batteries. Lead-acid batteries have been around for a while and are reliable but require upkeep and venting. Lithium batteries are the new kids in town – they’re lighter, last longer, and need less maintenance. They’re on the higher end in terms of cost, though it could be worth it in the long run.
The charge controller is another crucial piece of the puzzle. It’s there to make sure your batteries don’t get overcharged. Think of it as a guard, standing on duty to protect your investment.
Don’t forget about the inverter. Since your batteries store power in DC form but many of your appliances need AC, the inverter’s job is to make that conversion. This is what lets you use everything from your microwave to your laptop.
You might also need some additional accessories. Mounting brackets for your solar panels, wiring kits, and fuses all help in putting your system together efficiently. And a good quality solar monitor can keep you informed about your system’s performance at a glance.
Investing in the right gear is key to a smooth-running, efficient setup. Picking quality equipment means fewer headaches down the road and more time enjoying the open road.
Planning Your Solar Power Needs and Setup
Calculating your power needs is all about figuring out how much juice you use daily in your RV. Take stock of everything you run on electricity – from lights and fans to gadgets and appliances. Then, look at their wattage and how many hours a day you use them. This will give you a total daily watt-hour (Wh) figure.
Once you know your power needs, it’s time to estimate how many solar panels you’ll require. Check the wattage rating of the panels you’re considering and see how many hours of sunlight you typically get. More panels might be necessary if you have high power demands or travel in cloudy regions often.

Determining your battery capacity follows a similar process. Your batteries need enough storage to cover your daily usage and a bit extra for cloudy days. Battery capacities are generally listed in amp-hours (Ah), so you might need to do a bit of math to convert your daily Wh into Ah based on your battery’s voltage.
With solar prep already installed in your RV, setting up a basic system can be pretty straightforward. Usually, it’s a matter of connecting your panels to the charge controller, hooking up the batteries, and then wiring to the inverter. If you’re unsure, there are plenty of DIY guides or professionals who can lend a hand.
Thinking about expanding your system? Start by ensuring your existing charge controller and inverter can handle additional panels and batteries. If not, upgrade these components first. Then, add panels and batteries as needed, always keeping an eye on your power requirements and available space.
Placement is crucial. Solar panels need to be mounted in a spot where they get maximum sunlight – usually the roof. Keep them tilted correctly to catch those rays. Batteries and other equipment should be within easy reach but secured to prevent movement. Proper ventilation for batteries is also essential to avoid overheating.
Efficient wiring is another part of the setup. Use cables suited for the current they’ll carry, and keep them as short as possible to minimize power loss. Don’t forget fuses or circuit breakers to protect against short circuits – safety first!
Maintaining and Monitoring Your RV Solar Power System
Keeping your RV solar power system in top shape is all about regular maintenance. Just a bit of upkeep can extend your system’s life and ensure everything runs smoothly. Panels need to stay clean; dirt and debris can seriously cut down on their efficiency. A simple wipe-down with a damp cloth usually does the trick.

Monitoring your system is crucial for catching issues early. Many monitors show you real-time data like current output and battery charge levels. Some even come with apps that let you track everything from your phone. Knowing your system’s performance helps you make adjustments before minor issues become big problems.
Troubleshooting is part of the territory. Sometimes, panels might not be getting enough sunlight due to shading or positioning. Check connections regularly to make sure there are no loose or frayed wires. If your batteries aren’t holding charge well, it might be time for a replacement or an upgrade to lithium options.
Regular checks are essential. Inspect your panels and wiring every few months to ensure no physical damage. Batteries need a more frequent check-up, especially the fluid levels in lead-acid batteries. Always consult the manufacturer’s guidelines for maintenance schedules.
Technology can make your life easier here. Apps for solar monitoring not only give you real-time data but also alert you to potential issues. A few taps on your screen can give you a comprehensive look at how everything’s functioning.
Best practices include having a maintenance schedule, using good quality components, and being proactive. Following these steps reduces the chances of sudden failures and keeps your system delivering the power you need.